


Connect a Business Bank Account
You can connect a business bank account in Expensify using the following supported currencies: USD, CAD, GBP, EUR, and AUD. Once connected, you can use it for reimbursements, Expensify Card payments, and invoice payouts.
Connect a Business Bank Account
You can connect a business bank account from a workspace or from your Wallet. You can also link an already-verified business bank account to a new workspace without repeating the full setup process.
Who can connect a business bank account
Only Workspace Admins can connect a business bank account. All individuals associated with the account must have a US address, US photo ID, and a US SSN.
How to enable Make or track payments in a workspace
Before connecting a bank account from a workspace, enable the payments workflow:
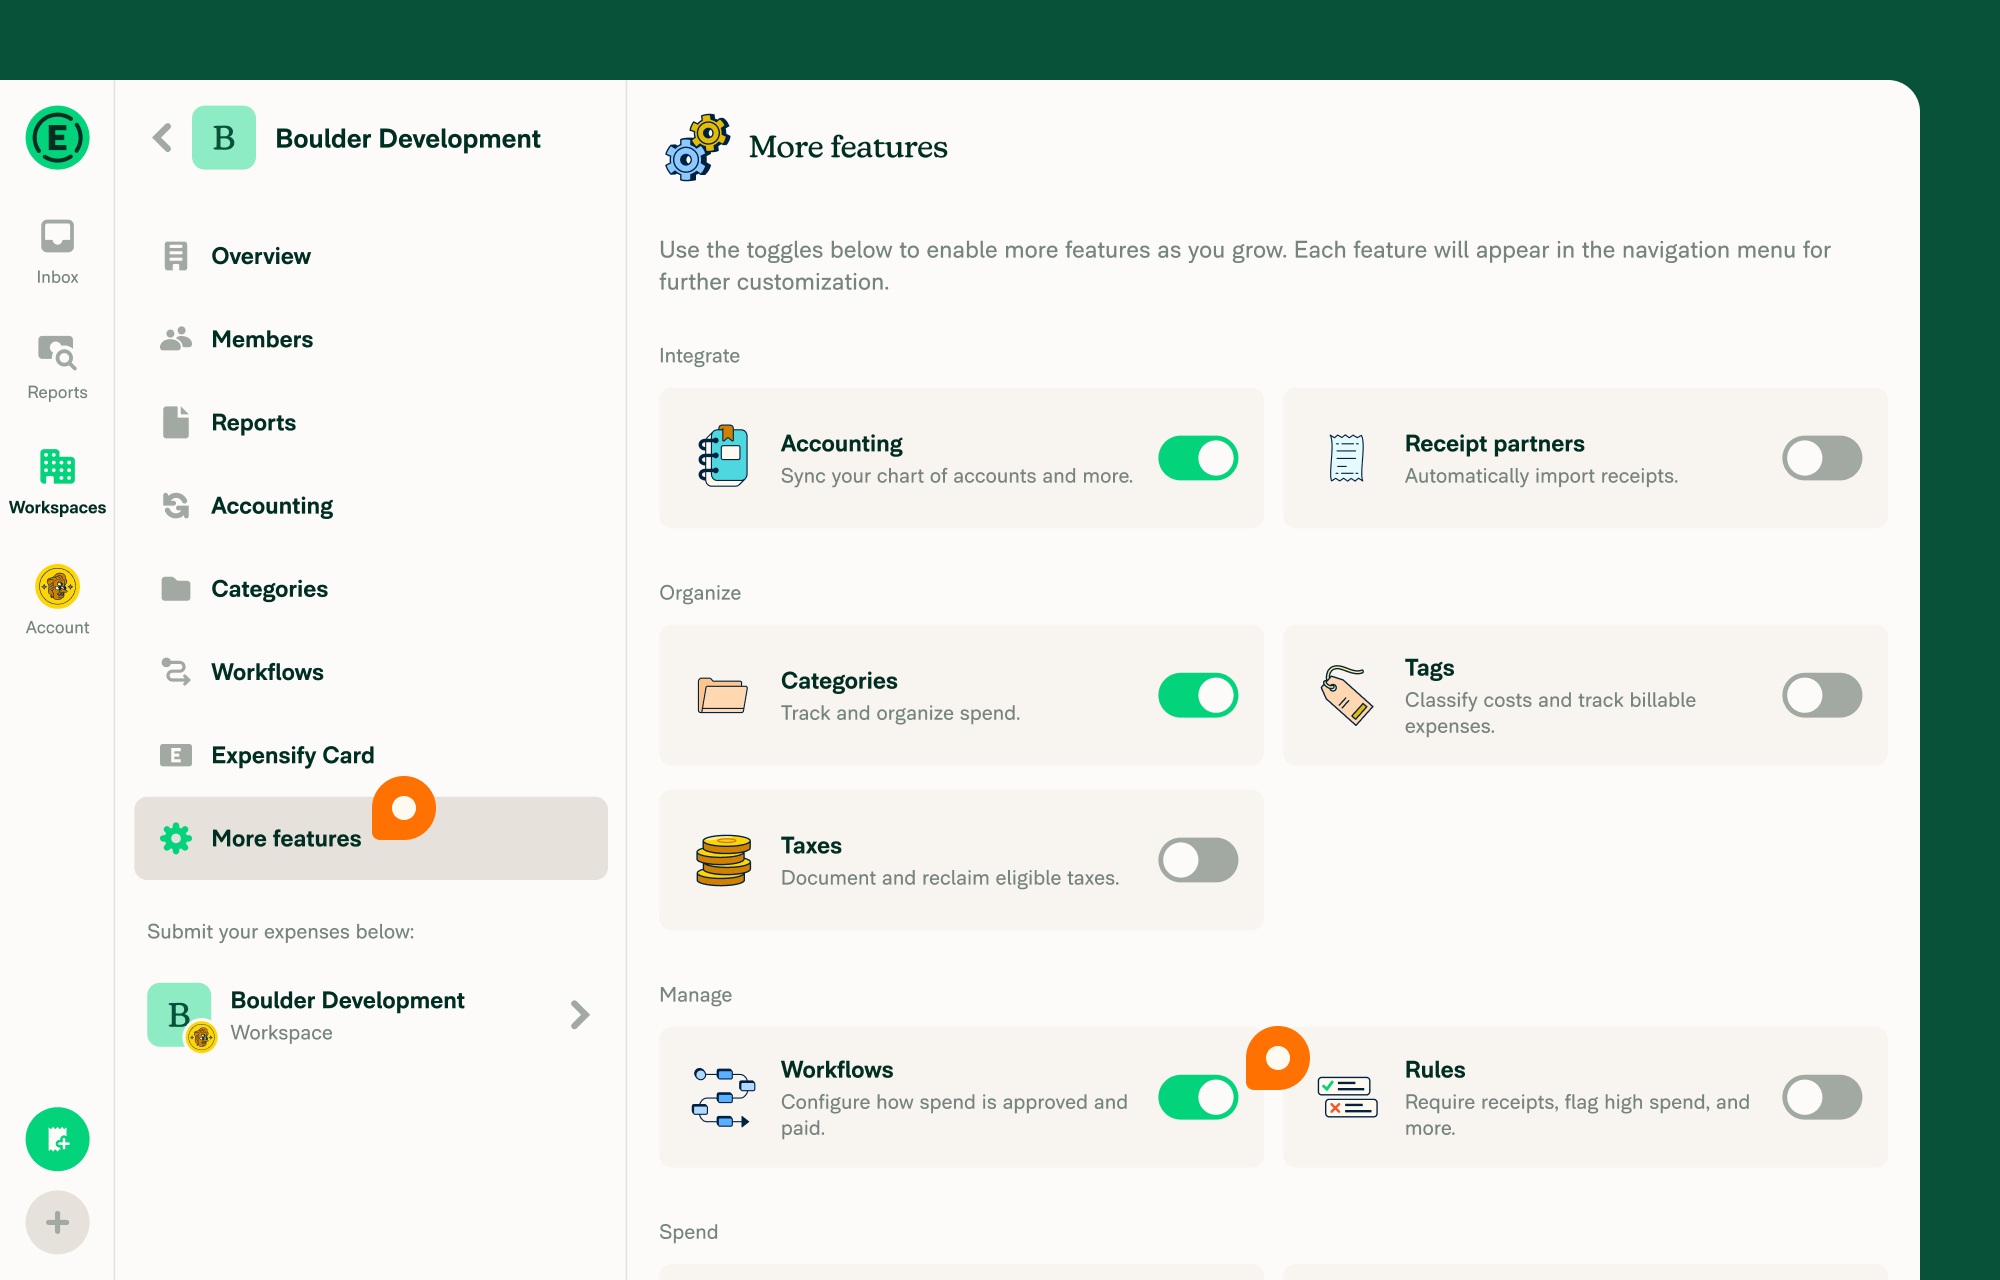
- Click Workspaces in the navigation tabs (on the left on web, on the bottom on mobile).
- Select your workspace, then click More features.
- Enable Workflows.
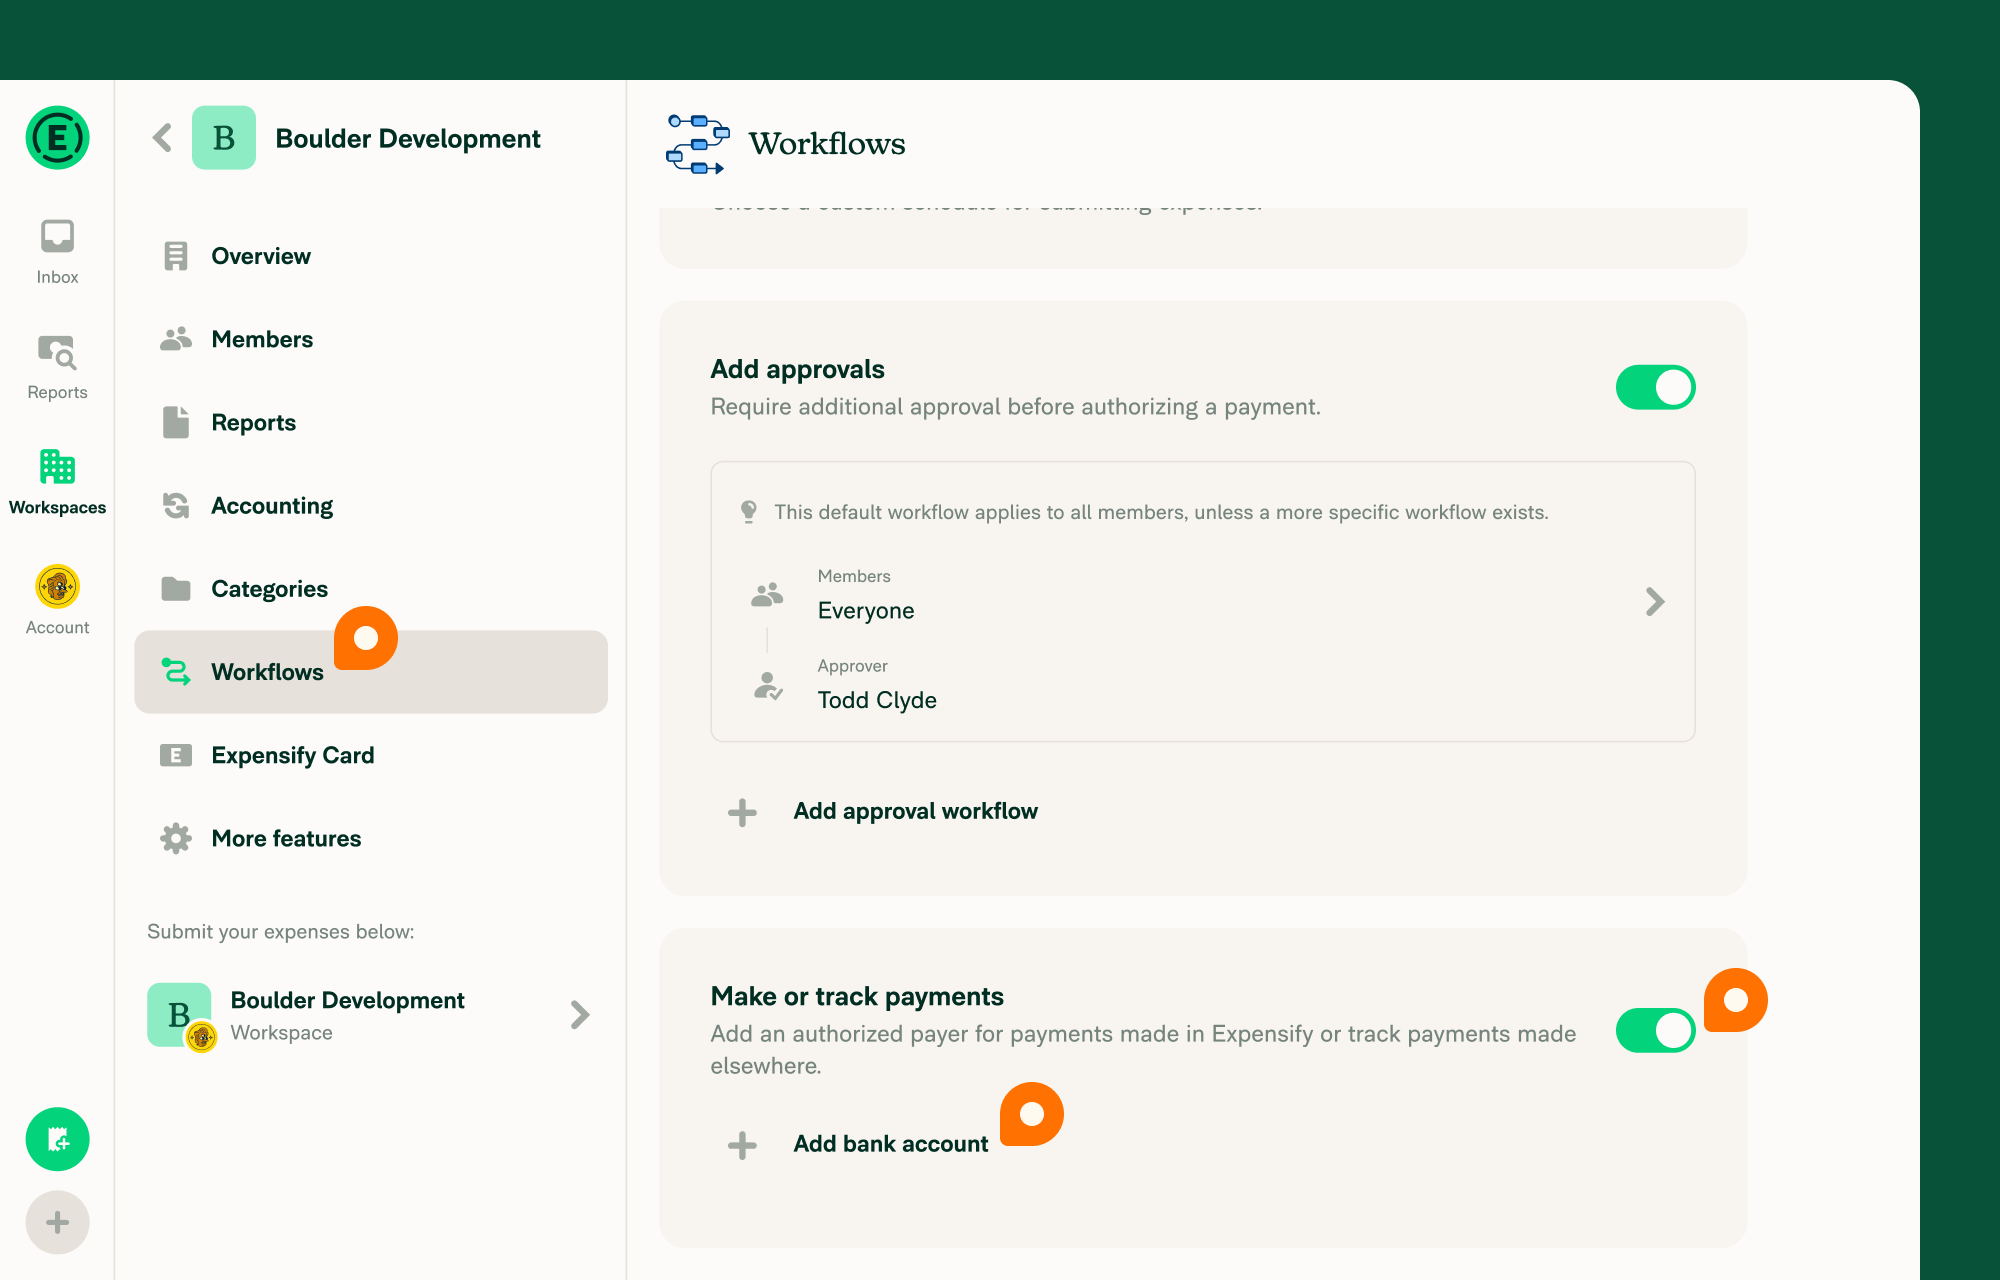
- Click Workflows in the left-hand menu, then enable Make or track payments.
How to connect a new business bank account from a workspace
- Go to Workspaces > [Workspace Name] > Workflows.
- Click Connect bank account.
- Select Connect online with Plaid (preferred) or Connect manually.
- Enter your bank details.
- Complete the identity verification, company details, and Beneficial Owner steps described below.
If your business bank account already exists in Expensify, an admin with access can share it with you instead. Learn how to share a business bank account.
How to add a new business bank account from Wallet
- Go to Settings > Wallet.
- Click Add bank account.
- Select Make payments.
- Choose the country where your bank is located.
- Follow the steps to connect your bank account via Plaid or manual entry.
- Complete the identity verification, company details, and Beneficial Owner steps described below.
How to link an existing business bank account to a workspace
If you already have a verified business bank account and want to use it for reimbursements on another workspace:
- Go to Workspaces > [Workspace Name] > Workflows.
- Click Connect bank account.
- If any existing business bank accounts match the workspace currency, they appear in a list.
- Select the account you want to link.
- If the account setup is incomplete, you’ll be guided to finish it.
How to verify your identity with a US-issued photo ID
After entering your personal details, complete identity verification:
- Upload a photo of the front and back of your ID. The photo cannot be a photo of an existing image.
- Take a selfie and record a short video of yourself.
Your ID must be issued in the US with an expiration date in the future.
How to add company details for bank account verification
Provide the following company information:
- Company address — Must be a physical US address. PO Boxes or mail drop addresses will be flagged for review and may delay verification.
- Tax Identification Number (TIN) — Assigned by the IRS.
- Company website — Required to access most Expensify payment features.
- Industry Classification Code — Find the list of codes at census.gov/naics.
How to add Beneficial Owner details
- Check the appropriate box under Beneficial Owner. A Beneficial Owner is an individual who owns 25% or more of the business. If no individual owns 25% or more, leave both boxes unchecked.
- Accept the agreement terms and verify that all details are true and accurate.
What to expect after submitting your bank account details
After you submit your details:
- Documentation review — In some cases, Concierge may request additional documents such as business address verification or a bank letter. Concierge will follow up directly if needed.
- Test transactions — Once your account is nearly ready, you’ll see the message “Your bank account is almost set up!” This means Expensify has sent three test transactions, which usually arrive within 1–2 business days.
- Validation — Enter the three exact amounts to complete setup. Learn how to validate a business bank account.
How business bank accounts appear in Wallet
Once connected, your business bank account appears in Settings > Wallet. If you have both personal and business bank accounts, Wallet separates them into Personal bank accounts and Business bank accounts sections.
Partially set-up accounts display an Action required badge. Click the account row to resume setup from where you left off.
FAQ
What are the general requirements for adding a business bank account?
To add a business bank account for ACH reimbursements or the Expensify Card, enter a physical address for yourself, any Beneficial Owner (if applicable), and the business. A US photo ID, US address, and US SSN are required for all individuals associated with the account.
Which industries does Expensify not support for direct payments?
Expensify cannot process direct payments for businesses in the following industries:
- Security Brokers & Dealers
- Dating & Escort Services
- Massage Parlors
- Casinos & Gambling/Betting Services
- Non-FI, Money Orders
- Wires, Money Orders
- Government-Owned Lotteries
- Government-Licensed Online Casinos (Online Gambling)
- Government-Licensed Horse/Dog Racing
- Crypto-currency businesses
- Internet gambling
- Marijuana-related businesses
- Firearm-related businesses (manufacturing and selling)
- NFT (non-fungible token) services
What is a Beneficial Owner?
A Beneficial Owner is an individual who owns 25% or more of the business. If no individual meets this threshold, you do not need to list a Beneficial Owner.
What if my business is owned by another company?
Only check the Beneficial Owner box if an individual owns 25% or more of the business.
Why can’t I input my address or upload my ID?
All individuals associated with the account must have a US address, US photo ID, and a US SSN. If you do not meet these requirements, an admin who qualifies should add the bank account instead.
Why am I asked for documents when adding my bank account?
Expensify follows federal regulations (BSA/AML laws) and anti-fraud measures. If automatic verification fails, Expensify may request manual verification such as address verification or a bank ownership letter. Contact Concierge for assistance.
What should I do if I don’t see all three test transactions?
Wait two business days. If the transactions still haven’t arrived, contact your bank and ask them to whitelist the following ACH IDs:
- 1270239450
- 4270239450
- 2270239450
ACH Originator Name: Expensify
Once completed, contact Concierge to re-trigger the test transactions.
How does Expensify protect my data?
Expensify uses bank-level security measures. Learn more about Expensify’s security policies.